


How to use Parent Portal
Easily access reports, timetables and updates with the Parent Portal. Stay connected and informed about your child’s school journey.
Parent Portal
Instructions on how to access and use the Parent Portal
Finding & Logging in to the Parent Portal
Visit the College web site www.thac.nsw.edu.au
Click on the 'Login' icon in the top corner
OR
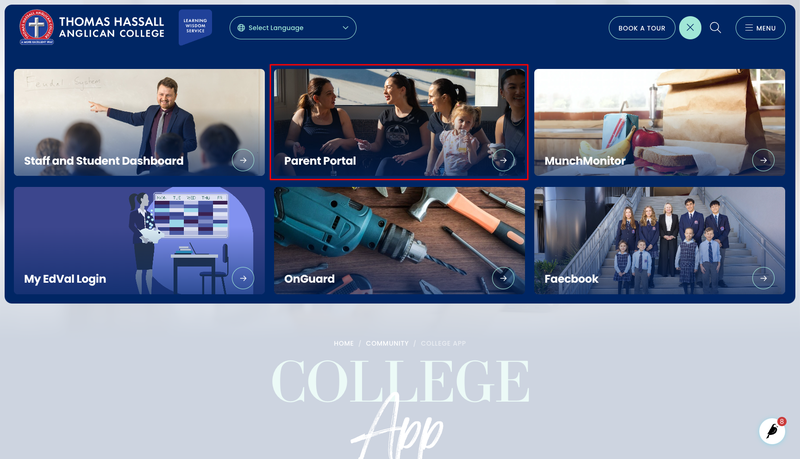
Click on the 'Community' in the menu bar and select 'Portal' from the drop down menu. Click on the ‘Parent Portal’ tab.
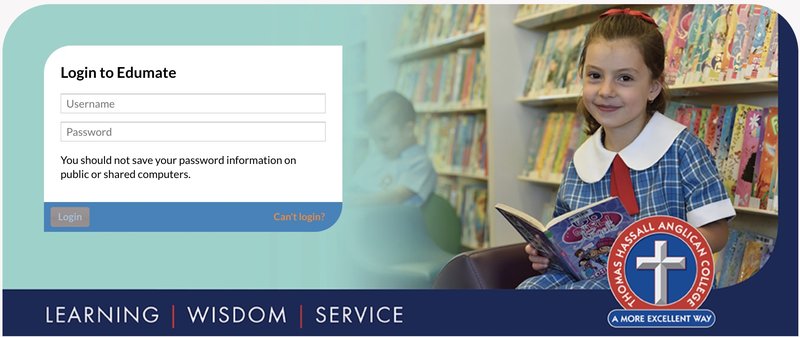
At the Edumate log in type in your username and password
PLEASE NOTE: Login information is provided by the College. If you have not received this information please contact the office.
The first time you log in you will be required to change your password.
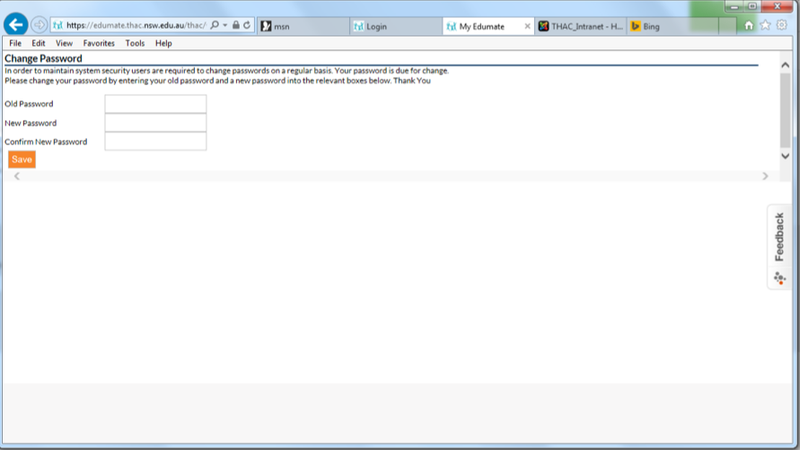
OLD password is the one you have just used to log in NEW password is one that you make up. Confirm New Password – enter your NEW password again
Click on Save
Navigating the Parent Portal
When you login to the Parent Portal, the following screen will be displayed:
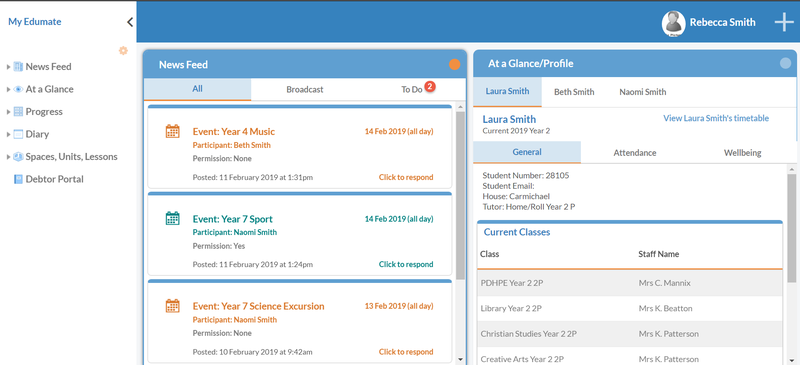
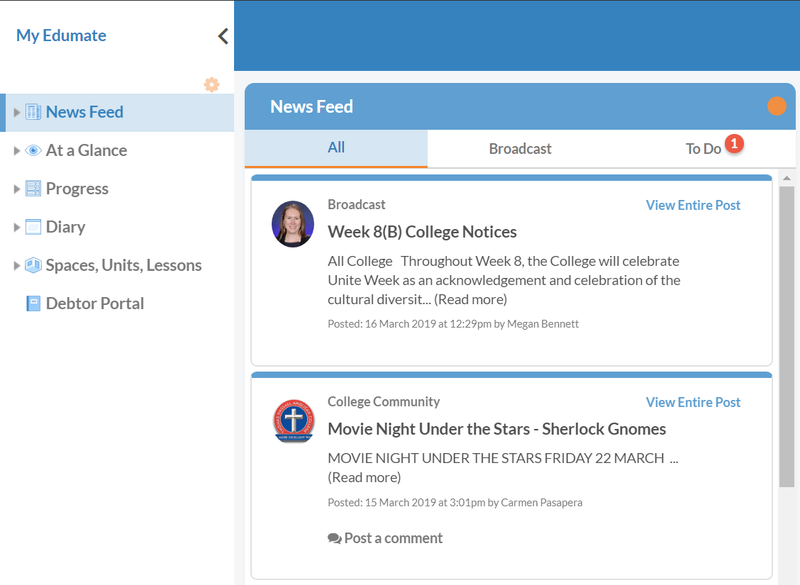
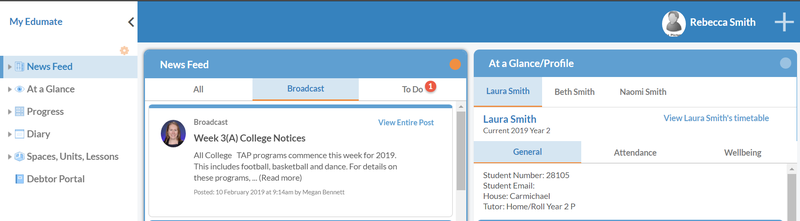
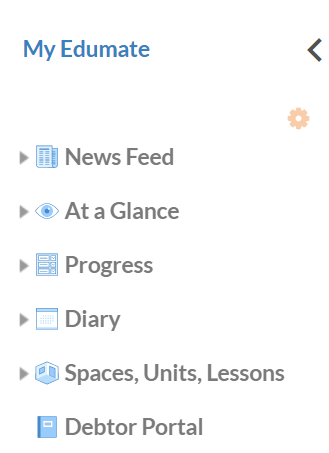
By default, the News Feed and At a Glance/Profile will be shown. Other functions within the Parent Portal can be accessed via the ‘My Edumate’ menu that is displayed on the left-hand side of the screen.
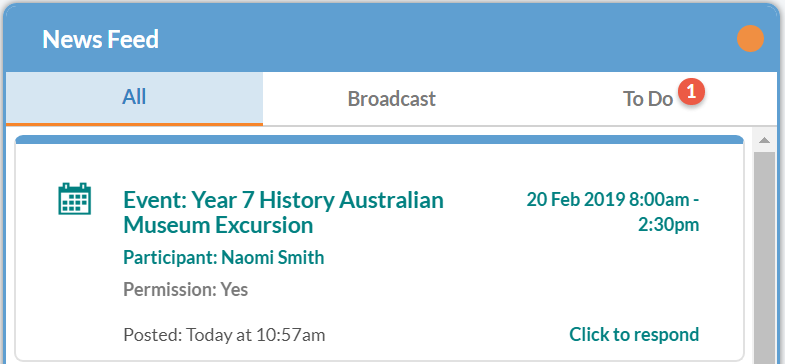
News Feed – displays important information such as the weekly College Notices and any items requiring your action (for example, event permission approvals such as an excursion).
The Broadcast tab shows messages posted by the College:

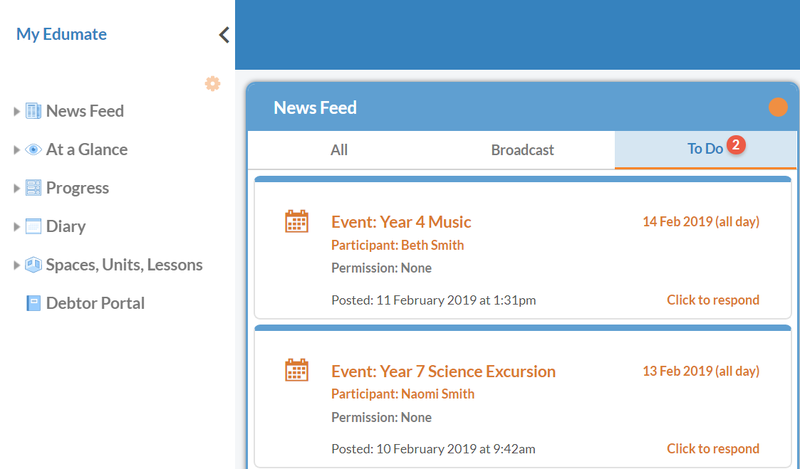
The To Do tab displays items requiring your action:
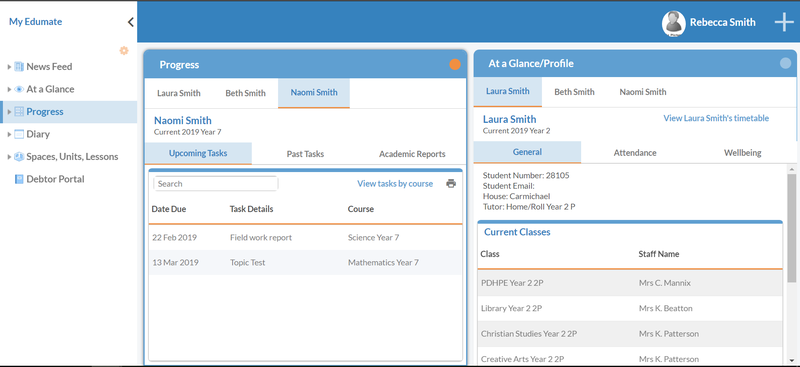
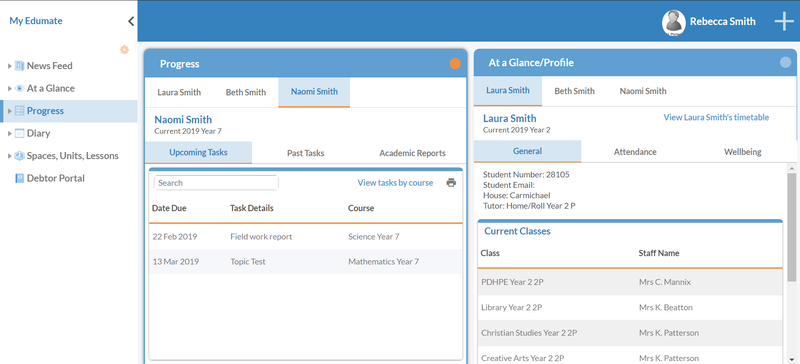
At a Glance – displays information for each of your children including their timetable, classes, attendance and wellbeing.
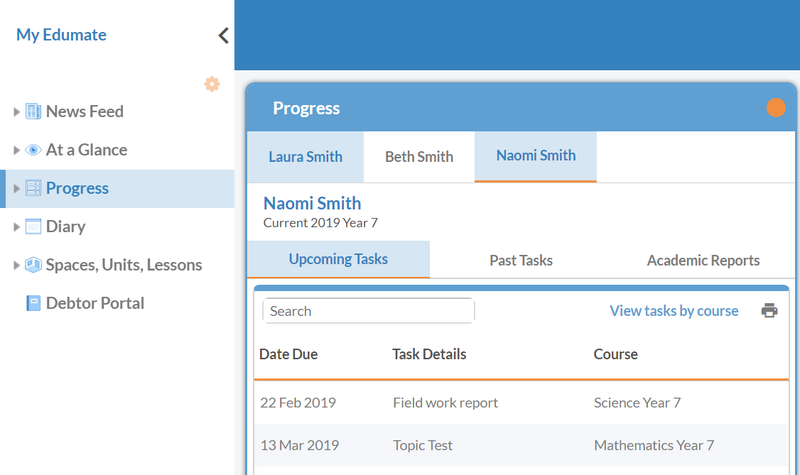
Progress – shows upcoming tasks, past tasks and academic reports for each of your children. The upcoming and past tasks are mainly for Senior School students:
Diary – displays future events, tasks and timetables for each of your children.
Spaces, Units, Lessons – this is a new feature within the Parent Portal that provides access to specific groups that your child/children may be part of - See "How to Acess Spaces" in this section for more information.
Debtor Portal – provides access to the Debtor Portal for paying College fees. For more instructions please click Debtor Portal above.
Changing details or passwords
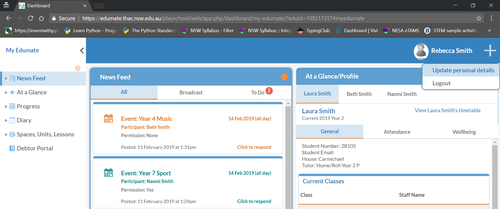
To change details, click on your name in the top right-hand corner of the screen and then Update personal details:
Once details have been adjusted and changes have been submitted, the College will need to approve the changes. Changes will not be displayed in the parent portal until they have been approved by the College.
To change your password, please contact the College.
Verifying student absence
Once you have logged in to the Parent Portal, use the At a Glance/Profile to select the child you wish to verify an absence for. Click on the Attendance tab:
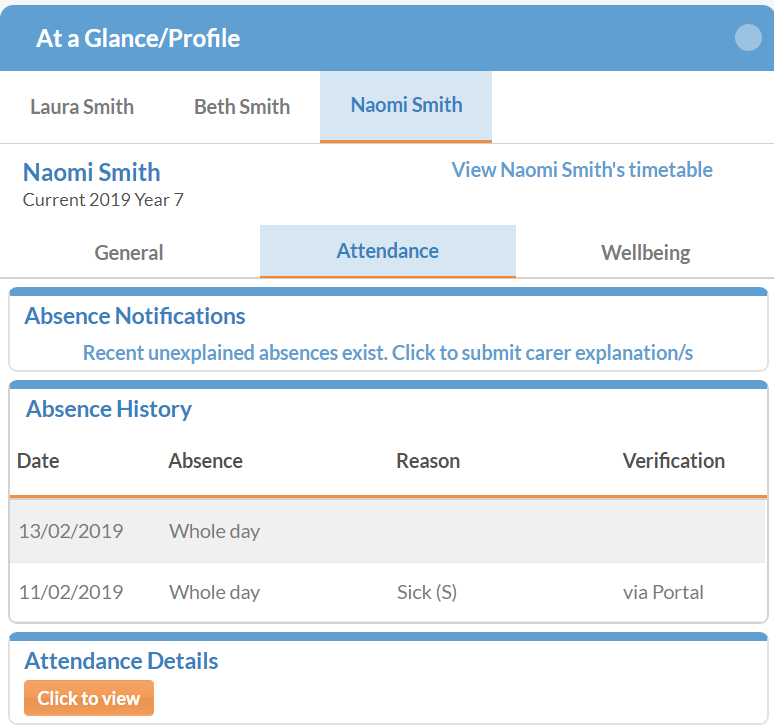
If you have unexplained absences that need to be verified, the message “Recent unexplained absences exist. Click to submit carer explanation/s” will be displayed under Absence Notifications (see above). Click on this message to enter your carer explanation/s.
Select the relevant date using the tick box, apply a reason for the absence (sick, sick – medical appointment, or other) and details in the textbox.
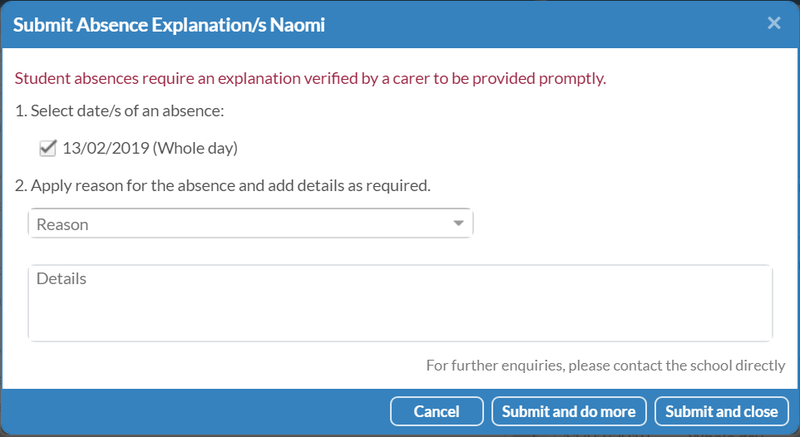
If you have multiple unexplained absence to verify, click Submit and do more, otherwise, click Submit and close.
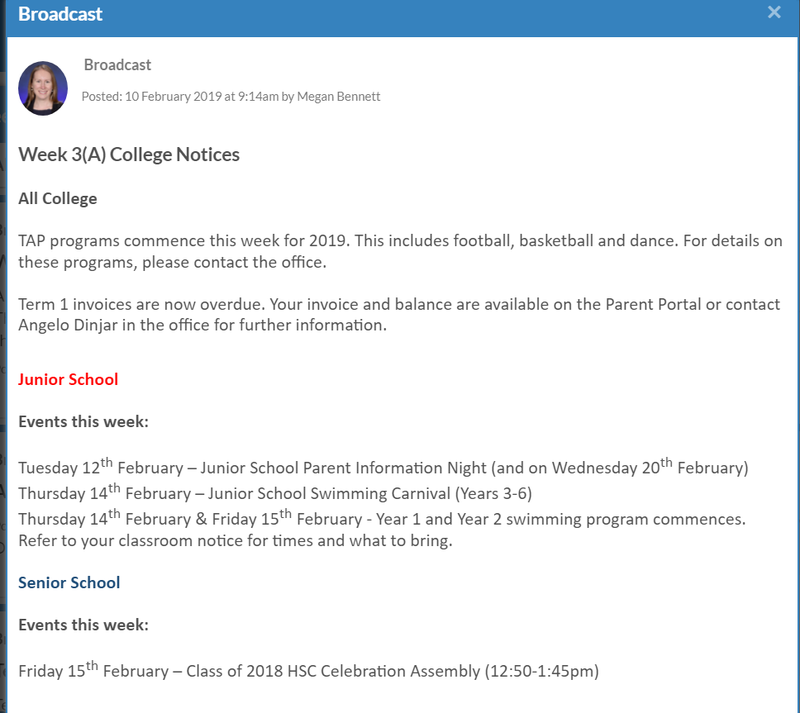
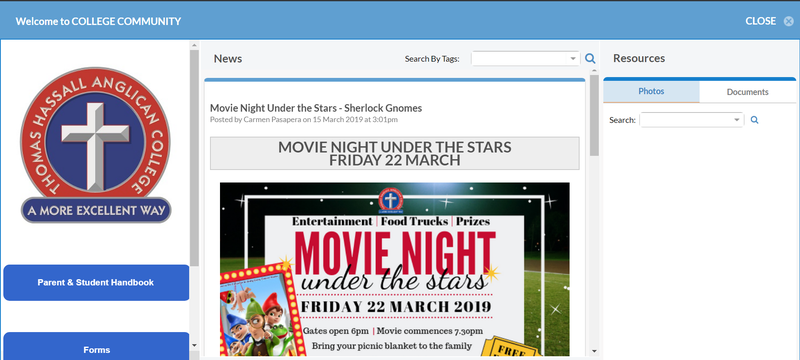
Viewing College Notices
College Notices will be published in the Parent Portal each week that contain information about upcoming events and other announcements for the forthcoming week. After logging in to the Parent Portal, ensure that the News Feed has been selected (using the My Edumate menu) and click the Broadcast tab in the News Feed window:
Click View Entire Post to see all of the details contained within the College Notices:
Granting permission for events
Instead of granting permission for events such as excursions using a paper form, the College is transitioning to the electronic granting of permission using the parent portal.
To grant permission for an event, login to the parent portal.
Events that require you to grant permission will be displayed in the News Feed under the All tab:

The To Do tab also displays events requiring your permission:
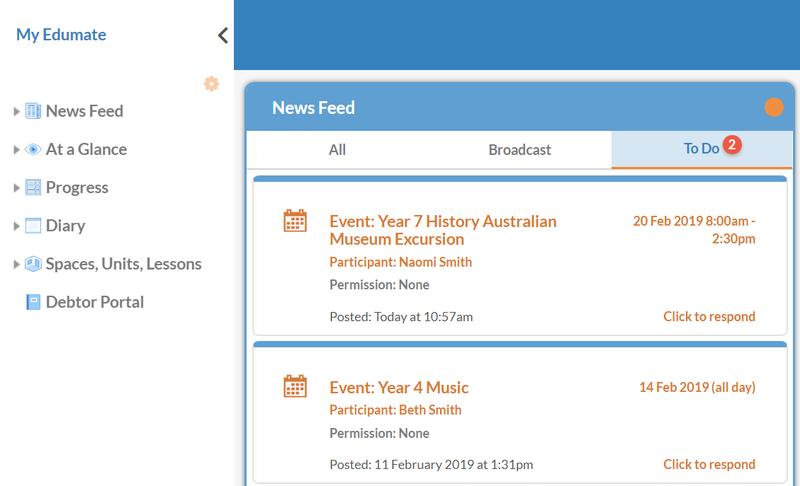
Click on the event title or the ‘Click to respond’ link to view details about the event:

The event permission window will be displayed:
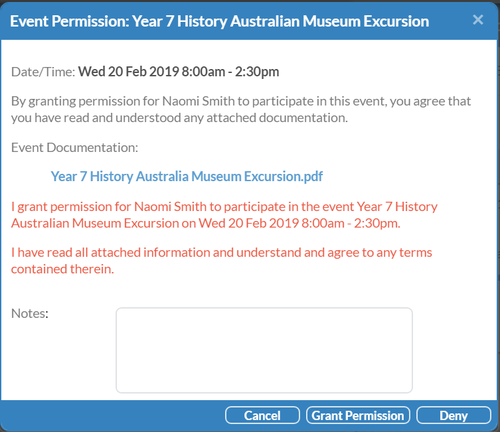
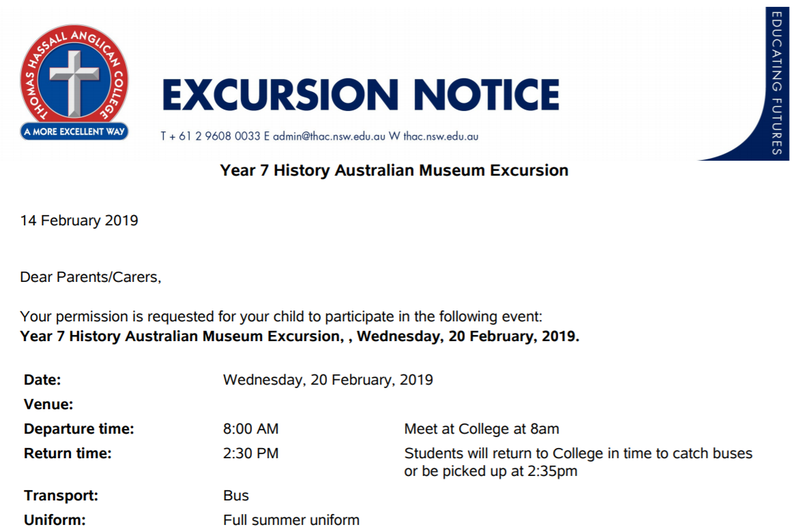
Click on the Event Documentation link to view details about the event. This will download the information note which will need to be opened to view. Please read the information about the scheduled event.
Enter any important information that the College should be aware of regarding your child’s attendance at the event in the Notes section:
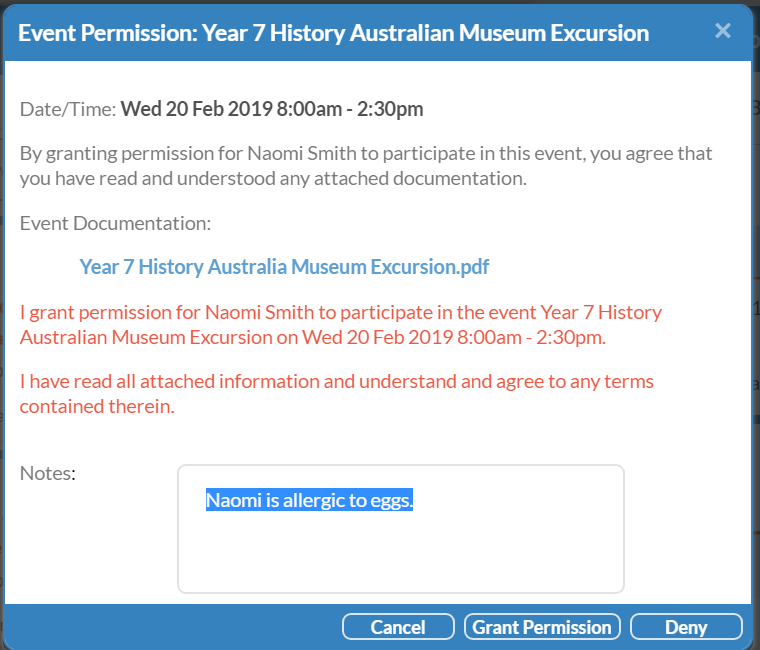
Click Grant Permission to authorise your child’s attendance at the event.
The News Feed will now indicate that you have successfully granted permission for the event by displaying the event in green and showing Permission: Yes
Viewing a student timetable
To view your child’s timetable, use the At a Glance/Profile section of the parent portal to select the relevant child (if applicable):
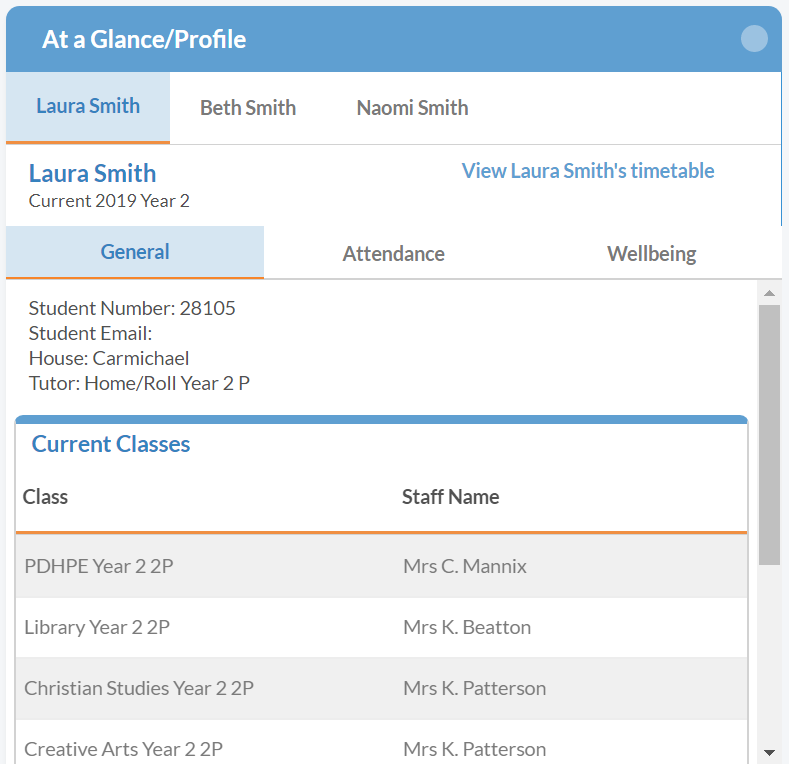
Next to your child’s name, click View timetable:
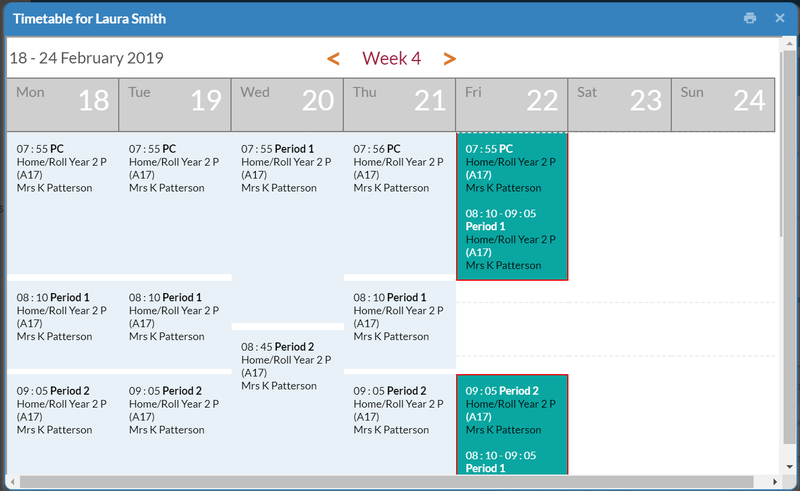
The timetable will be displayed with the option to print it in the top right-hand corner.
Viewing a student assessment tasks
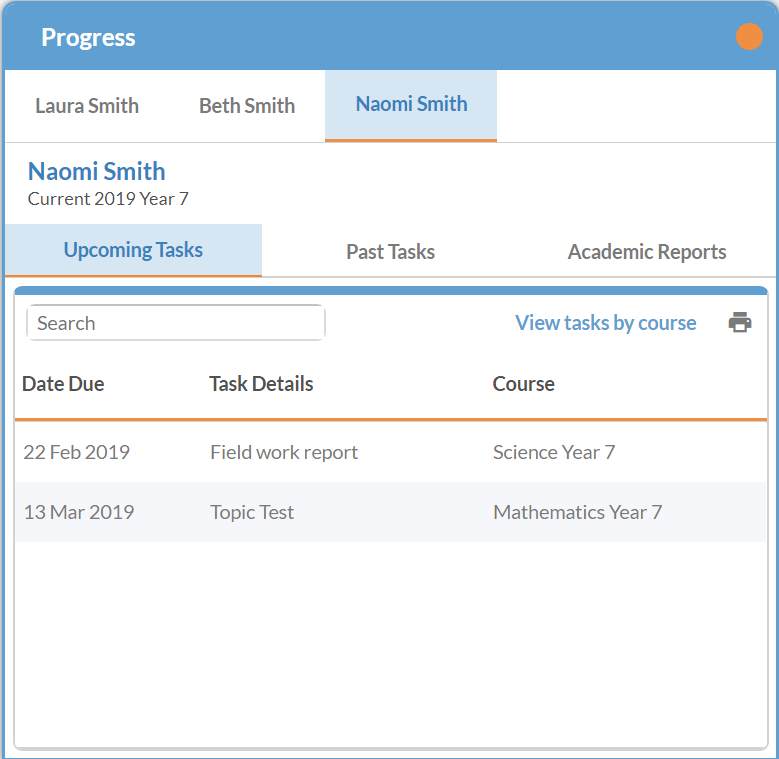
To view upcoming assessment tasks along with past tasks, use the My Edumate menu to select the Progress option:
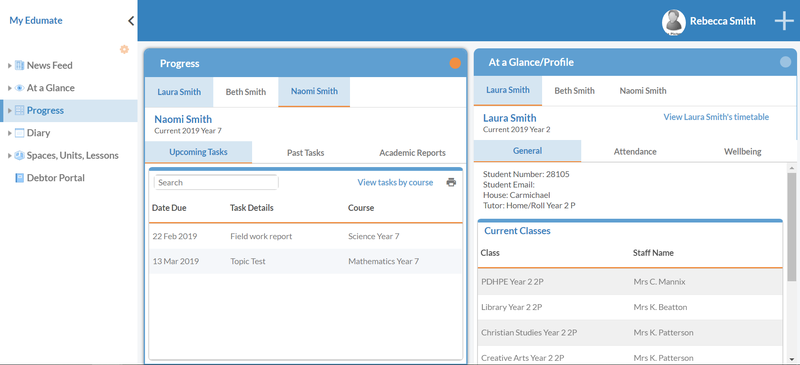
Select the relevant child (if applicable) and upcoming tasks will be displayed:
Viewing student results
To view assessment task results, use the My Edumate menu to select the Progress option:
Select the relevant child (where applicable) and click the Past Tasks tab:
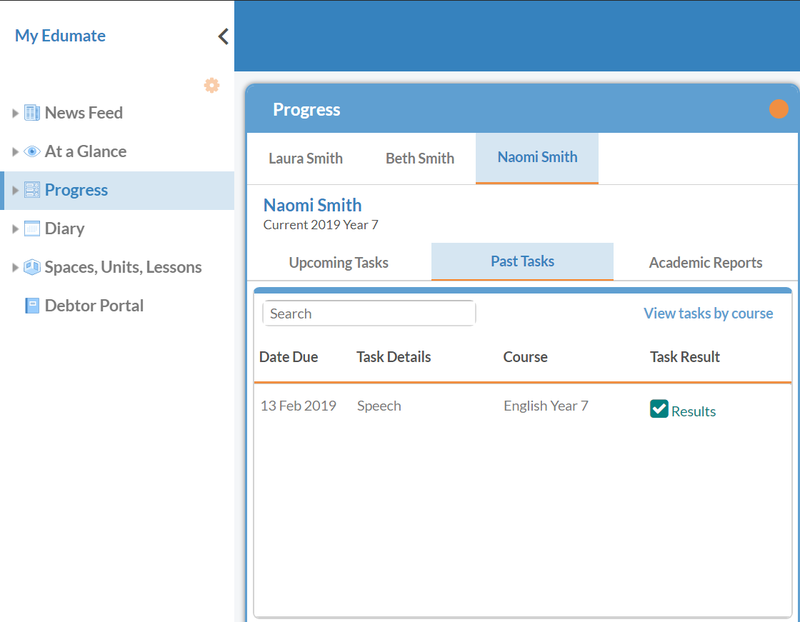
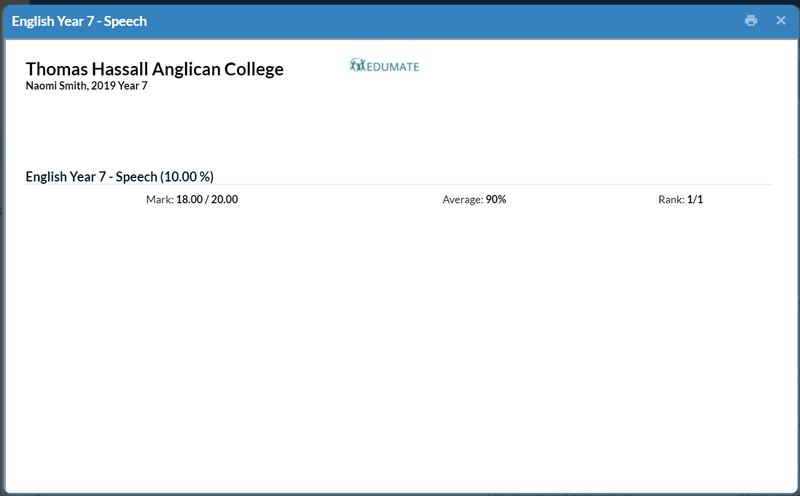
To view results for a task, click the Results link next to the specific task. The results will be displayed and can be printed:
Viewing academic reports
To view academic reports, use the My Edumate menu to select the Progress option:
Select the relevant child (where applicable) and click the Academic Reports tab:
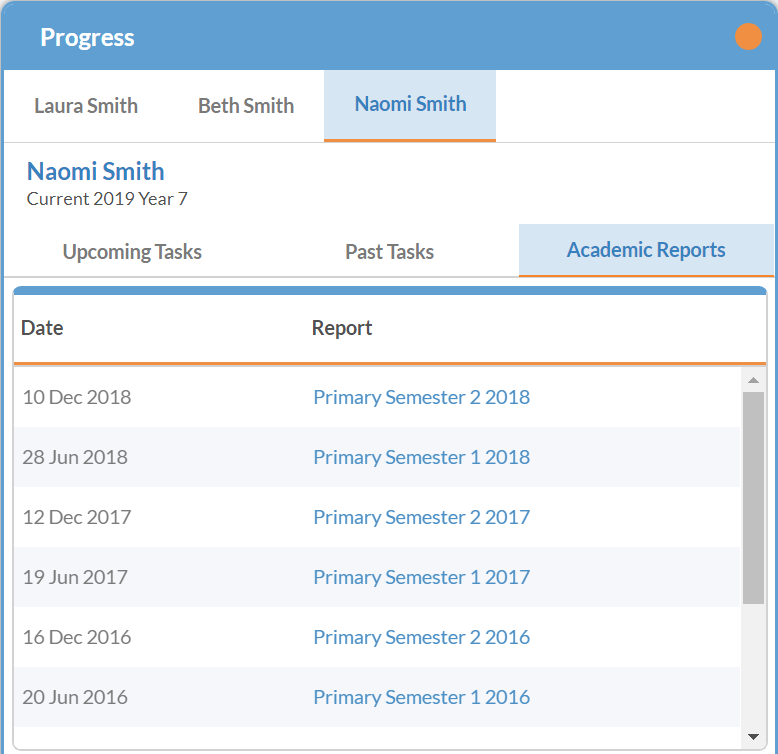
All available Academic Reports will be displayed. Click the link to the relevant report to download a copy.
How to Access Spaces
Spaces are locations in Edumate that are designed for sharing specific content.
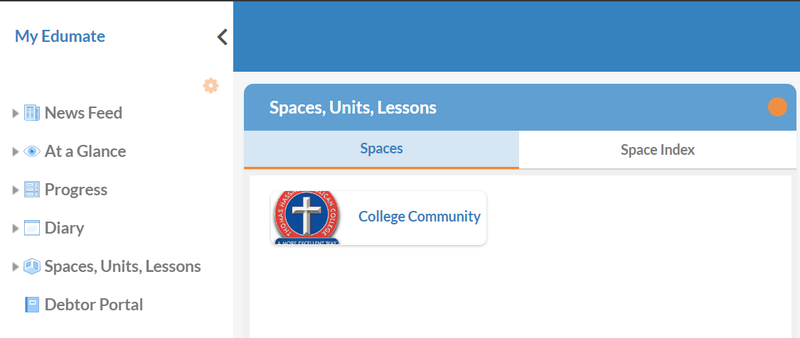
To access Edumate spaces, click on Spaces, Units, Lessons (under the My Edumate menu):
Select the required space by clicking on the button in the Spaces, Units, Lessons portlet (E.g. College Community):
The space will be displayed:
Access important documents from the left-hand menu (under the College logo).
Announcements will be posted under the News section and will also appear on your dashboard under the News Feed: